
The Correct Way to Use a Foam Roller for Sciatica Relief
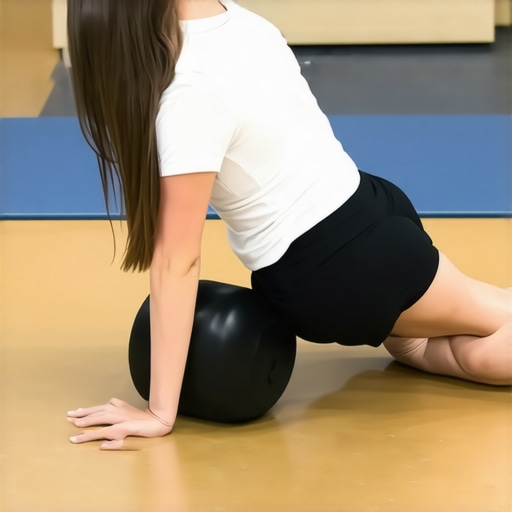
I remember the moment clearly—standing in my living room, wincing as I tried to bend down to pick up something, only to be halted by that persistent, shooting pain down my leg. It hit me then: I was doing everything right—or so I thought—to ease my sciatica, yet nothing seemed to help. Frustration turned into curiosity, and I realized that my approach to foam rolling might be all wrong.
Many of us think that a quick roll here and there, following generic videos online, is enough. But I learned the hard way that the way you use that foam roller can make the difference between relief and worsening discomfort. If you’ve ever spent precious minutes trying to relieve back or leg pain with a foam roller and felt like you were just making things worse, you’re not alone—and there is a correct way to do this.
Today, I’ll share what I wish I knew from the start: the *proper* technique to get the most benefits from foam rolling for sciatica relief, without risking further irritation. Whether you’re new to foam rolling or have been doing it wrong for years, this guide is your key to unlocking real, lasting comfort.
Why Technique Matters When Using a Foam Roller for Sciatica
Using a foam roller might seem straightforward—just lie down and roll back and forth, right? But the truth is, the devil is in the details. The wrong technique can compress nerves, inflame tissues, and even worsen symptoms. In fact, a study published in the *Journal of Bodywork and Movement Therapies* highlights that proper pressure and positioning can significantly impact the effectiveness and safety of self-myofascial release techniques like foam rolling.
One major mistake I made early on was applying too much pressure, focusing on tender spots without understanding that not all pain is beneficial. Instead, gentle, controlled pressure at the right angles makes all the difference. This mistake—common among beginners—is why many find foam rolling uncomfortable or even counterproductive.
If you’ve ever felt like your pain worsened after foam rolling, it’s worth revisiting your technique. Proper guidance can help you target the right muscles, reduce nerve compression, and foster mobility instead of irritation.
Want to avoid the pitfalls I’ve encountered? Stay tuned, because the next parts of this post will walk you through exactly how to use your foam roller safely and effectively for sciatica relief.
Find Your Starting Point Carefully
Begin by lying on your side with your foam roller positioned under your hip or the side of your thigh. Use slow, guided movements to identify tender spots—these are often tight fascia or muscles pressing on nerves. I recall a session where I gently rolled under my hip and found a particularly knotty area; applying light pressure here set the tone for effective relief. Remember, your goal is to ease tension without causing irritation.
Use Controlled, Gentle Pressure
Unlike pressing hard in hopes of quick results, think of foam rolling as a massage—gentle but firm. Start with a light touch and gradually increase pressure as tolerated. When I first tried pressing firmly over my sciatic area, I worsened my pain; shifting to a gentle glide made all the difference. This approach prevents nerve irritation and helps fascia release naturally.
Adjust Your Body’s Angle for Precision
Position your body to target specific muscles like the piriformis or hamstrings, which often impact sciatic pain. For example, lying on your back with your foot crossed over the opposite knee exposes the piriformis more directly. I once used this position to loosen my piriformis after noticing that tightness was mimicking sciatic pain—immediate noticeable relief followed. Simple exercises like this enhance effectiveness when combined with correct foam rolling.
Focus on Relaxed Breathing and Posture
Every movement should be paired with slow, deep breaths—this relaxes muscles and eases fascia. During one session, I found that holding my breath increased tension, making rolling uncomfortable. Also, keep your spine aligned and avoid slouching; this ensures effective pressure on target muscles and prevents aggravating your sciatic nerve. Think of your body as a well-oiled machine—relaxation and proper alignment keep everything running smoothly.
Practice Time-Efficient, Repetitive Sets
Limit sessions to about 2-3 minutes per muscle group, performing slow rolls back and forth with a pause on tender spots. The key is consistency—daily short sessions outperform sporadic intense efforts. I established a routine where I rolled my hamstrings for two minutes every morning; over a week, I noticed decreased numbness and shooting pain.
Incorporate Nerve Glides and Mobility Drills
Complement foam rolling with nerve glide exercises to enhance sciatic nerve mobility. For instance, the ‘sciatic nerve slide’ involves gently straightening and bending your leg while lying down, which I found especially helpful after foam rolling tight hamstrings, creating a clearer pathway for nerves to move freely. Combining these techniques maximizes relief and prevents re-tightening.
Don’t Skip the Follow-Up Care
After foam rolling, focus on stretching or strengthening key muscles. Revisit hamstring stretches or core stabilizers to maintain gains. During my own journey, I noticed that foam rolling alone was not enough; pairing it with targeted stretches kept my symptoms at bay much longer.
Many individuals assume that increasing flexibility through stretching alone will resolve chronic pain issues, but this oversimplification can be counterproductive. The common myth that all tight muscles are the root cause of back or neck pain overlooks a crucial nuance: mobility isn’t just about muscle length; it involves fascial health, neural tension, and movement patterns. For example, blindly stretching tight hamstrings without addressing underlying fascial restrictions can lead to overstretching tissues that are actually guarding against nerve irritation, potentially worsening symptoms. Advanced practitioners recognize that static stretching, especially without prior soft tissue preparation, might diminish your mobility gains and exacerbate problems if neural or fascial restrictions aren’t considered. The risk lies in applying these techniques prematurely or aggressively—think of it as forcing a door open before paying attention to the hinges and frame. To truly enhance your mobility and reduce pain, integrating nerve glides, fascia releases, and dynamic movement training is essential. As highlighted in recent research, neural mobility exercises can significantly improve symptoms of sciatica and neck discomfort by addressing the source of nerve entrapment rather than just the muscles.Maintaining your mobility and managing conditions like sciatica, neck pain, or back discomfort require more than just occasional exercises; it demands the right tools and consistent care strategies. Personally, I swear by certain equipment that has transformed my ongoing pain management routine, ensuring sustainable results over time.
First, invest in a high-quality foam roller—preferably one with a firm density and a textured surface—to target fascia restrictions effectively. I personally prefer the “TriggerPoint GRID” because its durability and surface texture provide the precise pressure I need without overstimulation. Alongside, a set of massage balls, like my personal favorite, the “Wallball,” helps me reach those stubborn knots in my lower back and hips that are hard to massage with a roller alone.
Second, consider a set of resistance bands. These have replaced traditional stretching in my routine, especially for nerve glides and mobility drills. Using a loop resistance band with specific attachments allows me to perform controlled nerve mobilization exercises, which are critical for addressing neural tightness associated with sciatic and neck pain. For example, I incorporate the “TheraBand” loop for my sciatic nerve slides, ensuring I maintain proper tension without risking overstretching.
Third, a reliable, adjustable ergonomic chair or standing desk setup is indispensable. Maintaining proper posture during work hours helps prevent recurring issues. I recommend the “Herman Miller” Aeron chair, known for its adjustable lumbar support and breathable design, to keep my spine aligned during long days. Additionally, a monitor riser to keep screens at eye level prevents neck strain—a common contributor to persistent discomfort.
Beyond equipment, I incorporate regular soft tissue therapies, such as self-myofascial release and nerve gliding routines, performed at least daily. To keep track of my progress and identify patterns, I use apps like “PainTrack,” which helps me log pain levels and triggers, making adjustments easier.
Looking ahead, the trend is moving toward personalized, tech-assisted recovery solutions. Wearable devices that monitor posture and muscle activation are becoming more sophisticated, helping us stay accountable and make real-time adjustments. For instance, smart posture trainers remind you to correct positions before pain exacerbates.
**How do I maintain my mobility and nerve health over time?** The key lies in consistent use of these tools combined with smart lifestyle choices, including ergonomic setups and mindful movement. To dive deeper into maintaining your spinal health, I recommend exploring our article on [[mobility maintenance tips]]](https://bodyrenewtherapy.com/mobility-mastery-daily-tips-to-keep-your-spine-and-joints-healthy). And if you’re ready to refine your technique or need personalized advice, don’t hesitate to [[contact us]](https://bodyrenewtherapy.com/contact-us). Remember, long-term relief is achievable when you combine the right tools with disciplined habits. Give one of these advanced strategies a try today—your future self will thank you.
Small Tweaks, Big Changes: How I Missed the Mark
One of my biggest revelations was realizing that applying *less* pressure often yields *more* relief. I used to think that pressing as hard as I could would break up fascia and end my pain, but it only aggravated my sciatic symptoms. The real breakthrough was understanding that control and gentle movements make the fascia respond better. Another lesson was recognizing the importance of body positioning—being mindful of my posture during foam rolling prevented unnecessary nerve irritation. Lastly, consistent, brief sessions proved more effective than sporadic, intense efforts—quality over quantity truly made the difference. These insights turned my approach from guesswork into a targeted healing practice.
Tools That Transformed My Recovery Journey
My first must-have was a high-density foam roller like the TriggerPoint GRID, which provides the right amount of firmness without overstimulating sensitive tissues. For stubborn knots, I turned to massage balls such as the Wallball, which allowed me to target smaller, hard-to-reach areas like the piriformis directly. Resistance bands, especially loops like TheraBand, became essential for nerve glides—making neural mobilisation safer and more controlled. Finally, ergonomic tools like the Herman Miller Aeron chair helped maintain proper posture daily, preventing old habits from creeping back. These tools collectively created a personalized toolkit that supported my progress and kept me committed to ongoing relief.
Your Moment to Take Charge of Sciatica Relief
Remember, genuine mobility and pain management require consistent effort, tailored techniques, and patience. Imagine a future where daily routines no longer revolve around pain and frustration but around movement and vitality. You’re capable of transforming your experience with the right knowledge and tools—like those discussed in our comprehensive guide to mobilizing and strengthening your spine. Take one step today, whether that’s experimenting with gentle foam rolling or scheduling a consultation. Your journey toward lasting comfort is within reach, and I believe in your ability to make it happen. Want to share your progress or ask questions? Go ahead and leave a comment below—your success story might inspire someone else to keep going.